Areas and Plans
Drawing tools
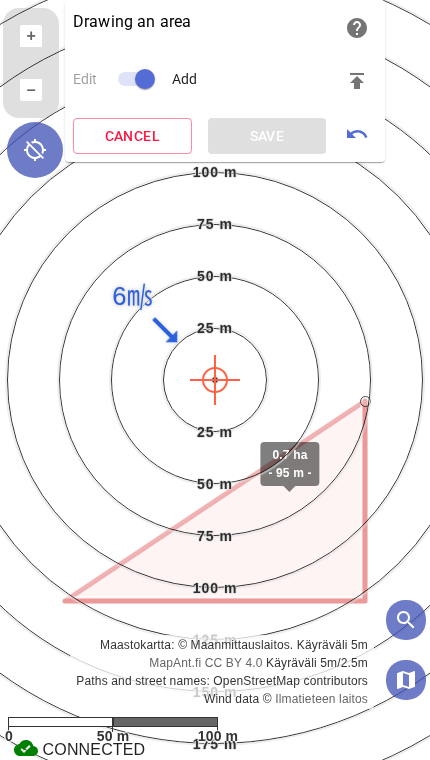
Karttahimmeli has three drawing tools:
| Tool | Use |
|---|---|
| Area | Closed polygon: full search area or individual segment |
| Plan (route) | Free-form line or route |
| Route area | An area drawn following a route, with a defined width on both sides |
Drawing tools are opened from the plus button.
Search area vs segment
In SAR terminology, the search area is the full geographic region under consideration. A segment is a subdivision of it — the unit assigned to one team for one operational period, with a calculated probability of detection (POD). Karttahimmeli's Area tool covers both: draw the overall search area first to visualise the scope, then subdivide it into segments for individual teams.
Drawing an area
An area is drawn by tapping desired corner points on the map. Finish and save the drawing with the Save button, or by double-clicking the last point (for areas, the first point also works).
While drawing, area size is shown in real time. This helps estimate how large the planned areas are. It's also worth keeping scale circles visible to make drawing areas easier.
Do not draw by contour lines
Boundaries should follow visible terrain features: ditches, valleys, hills, roads, paths, or swamp edges. Contour lines are not visible in the field, so they are not good search-sector boundaries. Property boundaries may be clearly visible in the forest if the forest stands are of different ages.
Precise drawing with the crosshair
Finger tapping is not always accurate enough. For precision, use the crosshair:
- Move the crosshair to the desired location
- Tap the crosshair
- Move the crosshair to the next point
- Tap the crosshair again
This also allows precise line drawing along a path. Finish the same way as when drawing with a finger: tap Save.
Route area
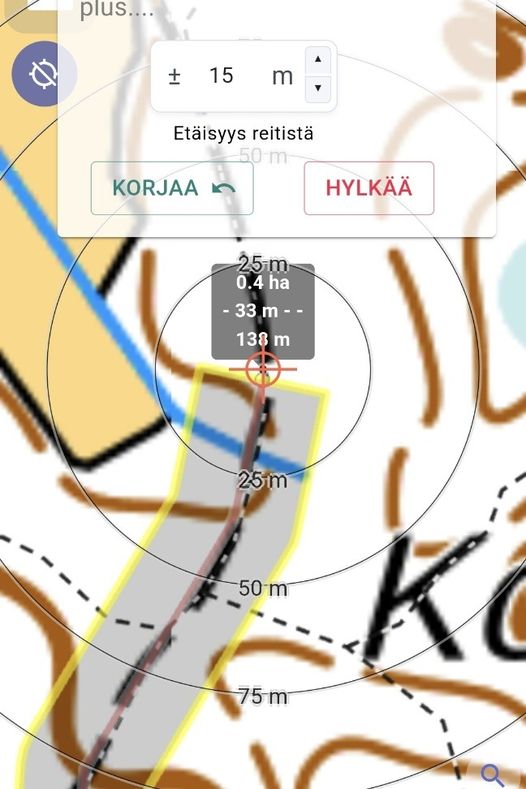
Route area width
A good route area width is the searcher's estimated effective search depth from the route. Note that Karttahimmeli does not account for actual road or path width, so add that in the width setting if you want the drawn depth to also be correct on the map.
Typical values:
- Dog team: 10-50 m
- Foot team ditch check: 5-15 m
- Foot team visual scan: 5-25 m
A route area is drawn like a route, but with a width from the centerline. This is useful for:
- Planning route-based patrols for vehicle teams
- Creating route-based sweep areas
Drawing on phone
Drawing with fingers can be difficult with gloves. Use the crosshair for precise points, or draw roughly first and refine later.
Extra info for areas
Areas can include:
- Name - shown on map as text
- Extra info - free text field
Extra info can include at least:
- Instructions to search team (Start from north)
- Terrain notes (Stream crossing difficult, use rocky section)
- After-action note (Area covered, no findings, snow to mid-calf)
Remind the search team
If you wrote important guidance in area extra info, tell the search team separately that extra info exists.
Segment popup: status and visibility
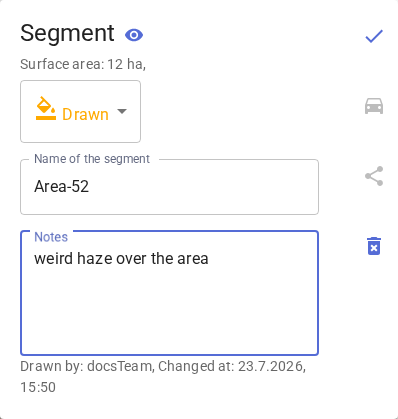
The segment popup opens by tapping the area on the map — but only if the entire area fits on screen. If part of the area extends beyond the visible map, zoom out (or pan) until the whole boundary fits on screen; only then does tapping it open the popup.
The popup shows the segment's surface area and a status selector for tracking search progress:
- Drawn – the area was just drawn, searching hasn't started yet
- Active – the area is currently being searched
- Searched – searching the area is complete
The eye icon in the top-right corner of the popup hides the area from the map.
Restoring a hidden area
A hidden area can't be brought back by clicking the map — it's no longer drawn there. Visibility is restored from the Segments tab of the observation diary: find the area in the list and clear its hidden state from the eye icon.
Colors in plans
Routes and plans can use four colors. Colors can be used for example by:
- Different phases
- Different search team type
- Checked vs planned
Advanced: planning with layers
Command planning can be done on a separate password-protected layer that is not visible to search teams. Plans can then be published on the default layer at the right time. See Layers guide.
Editing and deleting areas
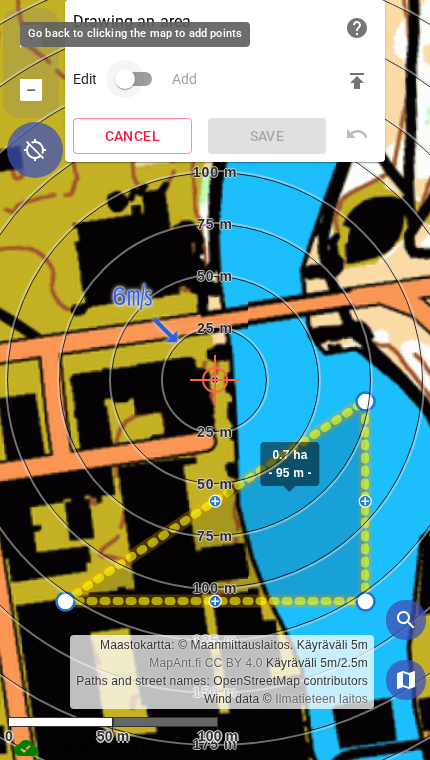
Both while drawing and after an area or plan is saved, points can be moved, added, and removed — there's no need to delete and redraw a shape just to fix it.
While drawing: flip the Edit/Add switch into edit mode. Drag a point to reposition it, tap the plus mark in the middle of a long edge to insert a new point, or tap a point to reveal a bin icon that removes it. Switch back to Add to keep placing points, then finish with Save or by double-clicking the last point.
On an already-saved area or plan: open it on the map and choose Modify drawing from the popup. The same drag/insert/delete controls are available as while drawing. Save the changes with Save changes, or discard them with Cancel.
Mistakes while drawing or editing can be undone
An undo icon () appears in the corner of the draw/edit window:
- While placing points, the undo button (or the Backspace key) removes the most recently placed point – tap it repeatedly to step back through the points drawn so far.
- While editing a saved area or plan (dragging, inserting, or removing a point), the undo button restores the most recent change, up to 20 changes back.
Editing an area imported via the property search (kiinteistöhaku) detaches it from the official parcel boundary — the edited shape is no longer shown as that imported area.
Deleting an area requires typing team name for confirmation, which helps avoid accidental deletion under time pressure or when wearing gloves.
Navigate to area
Next to area or plan points there is a route button that opens Google Maps navigation to that point. Useful when search team needs access to a rendezvous point.